How to Add LP on PancakeSwap V3 (Beginner-Friendly Guide)
PancakeSwap V3 is designed for more advanced on-chain users and offers a more complex liquidity mechanism than V2. If it’s your first time interacting with V3, make sure to follow these key setup steps carefully 👇
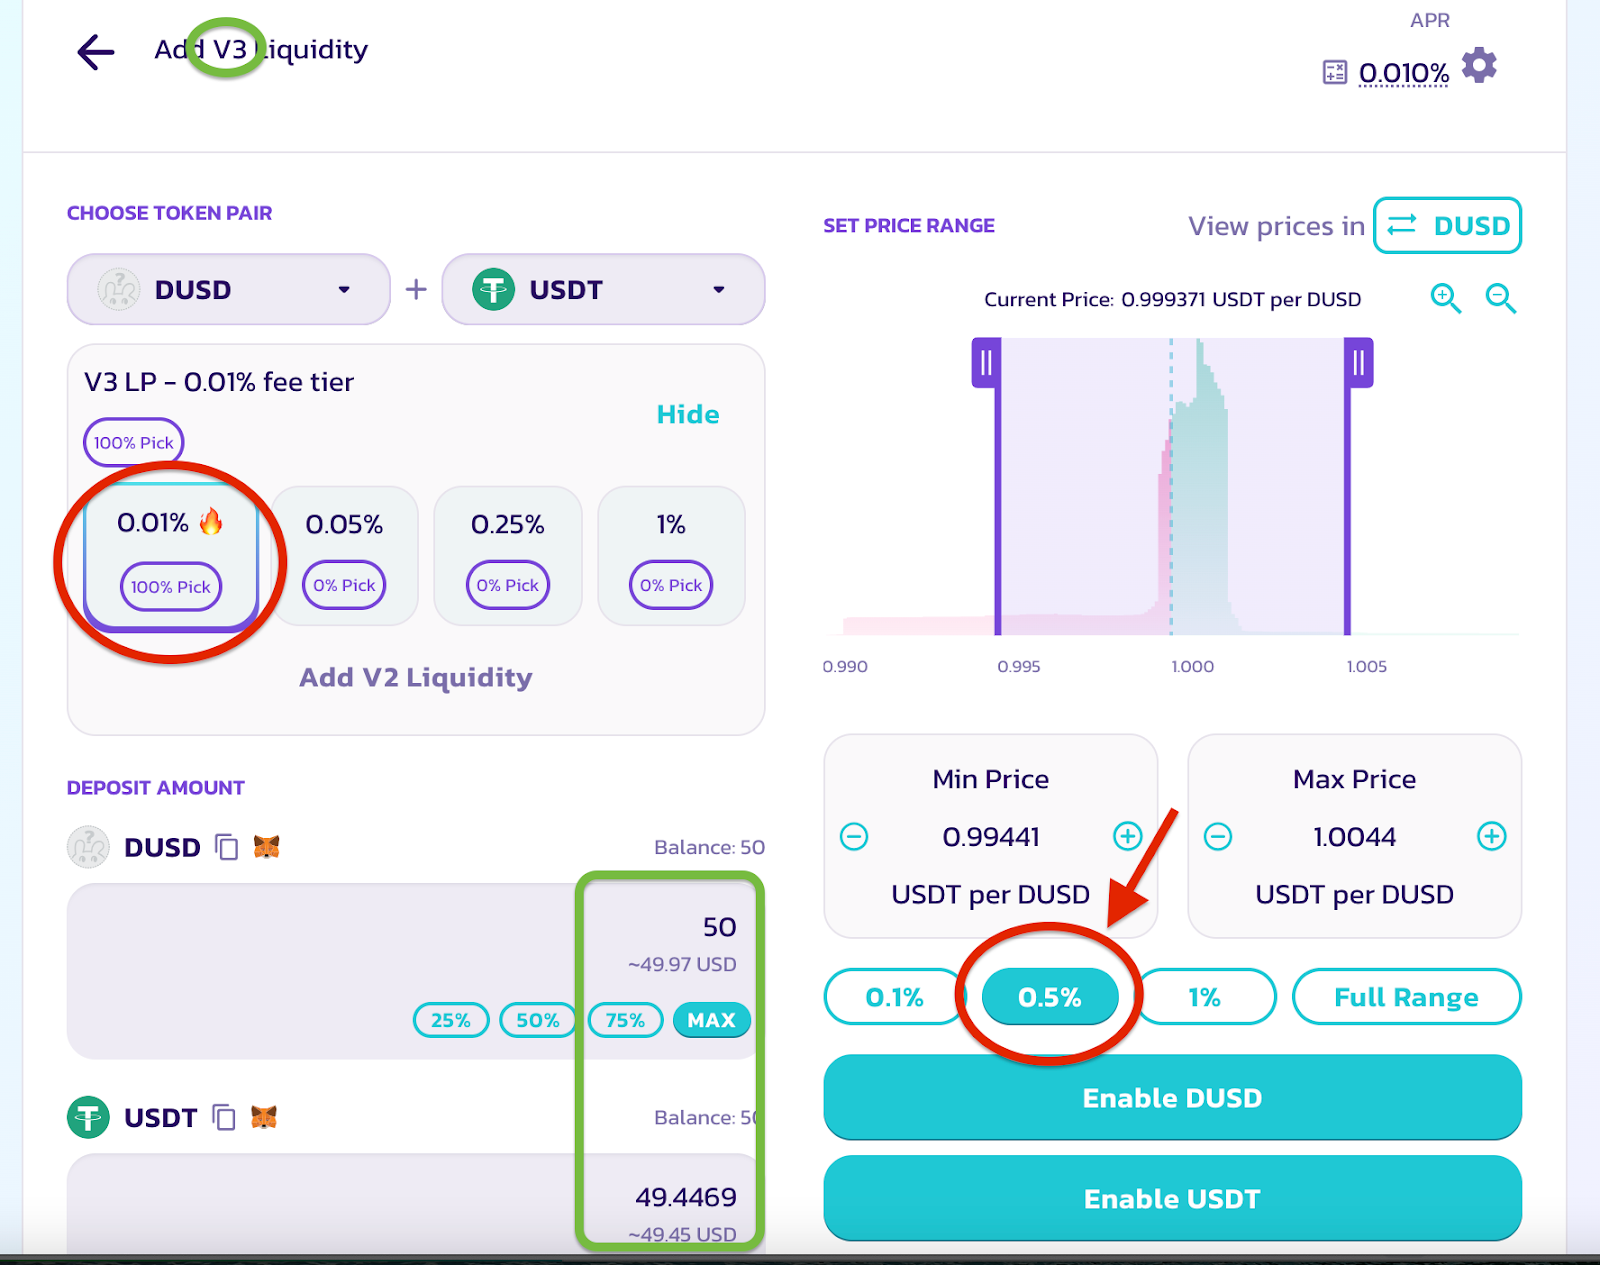
🔴 Step 1: Choose the Correct Pool (Red Circle Area)
Please select the 【0.01% 】fee tier pool.
👉 This is the pool eligible for StandX official incentives.
✅ The option can be found on the left side, marked in a red circle in the image.
🟩 Step 2: Select the Recommended Price Range (Green Box Area)
PancakeSwap V3 uses a CLMM (Concentrated Liquidity Market Maker) model, so you’ll need to set a custom price range.
💡 For beginners, we recommend using the default setting:
✅ Select the 【 0.5% 】 option — this provides liquidity within a reasonable price band and allows you to earn trading fees.
⚖️ Step 3: Check Token Ratio
After the settings, look at the asset input section on the left:
✅ Make sure your DUSD and USDT (or USDC) are provided in a close 1:1 ratio, otherwise your position may face impermanent loss due to being out of range.

If you’re not familiar with how to choose a price range or can’t monitor price changes regularly, we recommend starting with the V2 pool.